Film in a day

Reflections on the days exercise

This blog is looking back at the day, breaking down the day into the different tasks and the skills needed to complete each one.

Ideas Generation

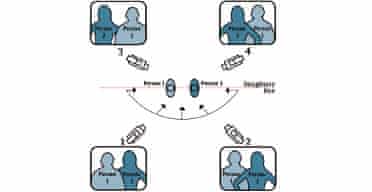
The session started with the group brainstorming ideas. A wide variety of ideas were proposed from serious documentaries on flooding to more whimsical plays. We took notes of these ideas. I think we were lucky that one idea, that of a mockumentary, caught the imagination of a number of the group and this was settled on fairly quickly. We tossed this idea around for a bit and the idea of using ‘snickets’ as the focus for our work arose. At this point research was needed on snickets and, whilst time was tight, internet searches gave us a bit of background to the subject. Creativity was at the heart of the above work and we were lucky to have some creative people in the group as well as people who seemed keen to collaborate. We started making notes about our general idea and how the film might be structured. Collaberation was vital for this.

Idea development

We started to develop the idea by writing down the main aspects of the film. Dividing them up into the beginning, middle and end.

Starting with the beginning we discussed the narrative that would lay underneath the film. I started to write down this narrative and, over the course of the next half hour, this was rewritten several times. Upon testing the timings of this, it was re-written to shorten it. We then discussed the middle part of the film, what was the thread going to be that held the film together? Could we repeat aspects in each shot. The narrative of snickets being under threat from alleys arose. We tried to add humour into this with the idea that the same shady character would appear in different shots, bot in the ‘nice’ snickets’ and the ‘nasty’ alleys. Again, creativity was a major part of creating this but we also needed some structure, lest the ideas floated about. Andrew took on the job of scripting the ‘middle’ part on the basis of the discussions held. This narrative was then presented to the group, discussed and re-written a couple of times.

Plan

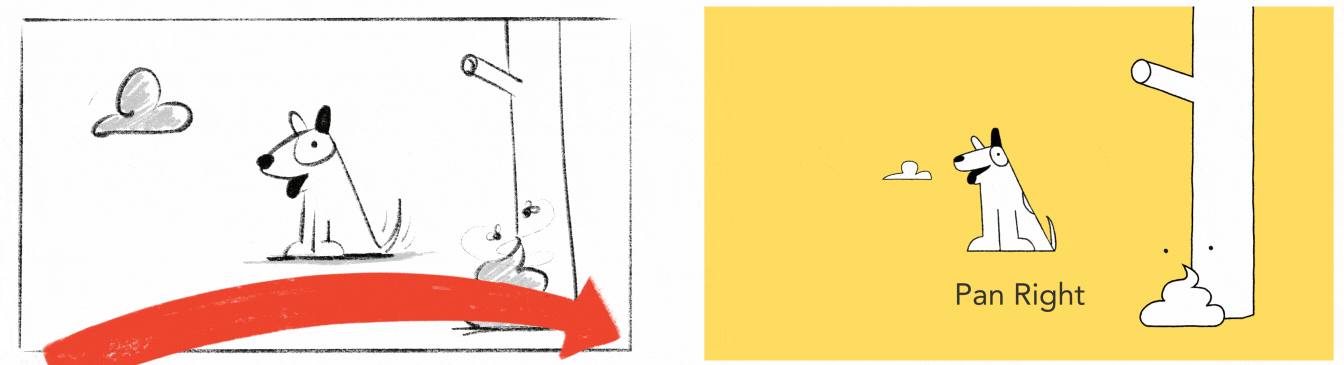
With a basic narrative agreed for both beginning and middle section, we started to break each part down into different shots (a shot list) and these were sketched out with indications of the type of shot, where the shot was to be undertaken (after some research into snickets of Kendal and relying on local knowledge). It was accepted that this could change once out in the field and so flexibility was required. With this done, different jobs were allocated to different people ranging from the presenter, camera operator(s), sound recordis, director, walk on parts etc. All of these parts needed different skills and so we tried to divide up to the most appropriate person, i think we did quite well in this regard.

Shooting the film

With jobs allocated (and lunch eaten), we headed into Kendal to shoot the film. It became apparent that, as anticipated, the actual shot changed as we saw the lie of the land and different people ‘saw’ nice shots. Likewise with locations, this changed as we went on. Light proved to be a unforseen problem. We were lucky that members of the group already had technical skills relating to operating the camera and recording the sound. Understanding how you can and cant use a camera was vital. There was not always agreement about which would be the best shot to take but on the whole the group worked well with each other to produce the footage. It did take longer to do the shots than anticipated.

Editing and producing

In order to save time (which was in short supply) we divided the editing tasks up into the beginning and middle parts of the film. We also separated out to shoot the spoken narrative. Undertaking editing of the beginning of the film involved creating a montage of shots from the drone footage to films of different snickets. This took a lot longer to achieve than editing the middle part of the film, despite the fact that the middle part was significantly longer. I would put this down to the fact that we had spent significantly more time thinking about each shot for the middle part of the film whereas the opening was simply labelled ‘ a montage’. This led to a large number of shots being taken and no plan to follow when editing. Editing really does require a good level of skill in the use of the software (which i dont have). We were also required to find a soundtrack for the opening and this required a good knowledge of where we might find this.

Our film

Reflections on the day

Given the time restraints i think the film produced was very good for amateurs. There was a good deal of co-operation amongst the group, even when there were differences in opinion. We appeared to have a good balance of skills from faultless presenting, to the technical skills required to use the camera and record the sound. Underpinning all this was the organisational skills needed to bring the creative ideas together and in this regard the creative cycle was a really useful tool, providing a framework from which to work on. A really positive experience.

I took a whole host of lessons home from the day. Whilst i was already nervous about the length of the script i had written for my own film, being responsible for writing and reading the narrative showed me how long it takes to read even a few short lines. This has made me rewrite my script (see the next blog). The temptation to get out and just shoot was reigned in by the structure of the creative cycle and this was really useful. It was very revealing how quick the editing was for the middle part of the film compared to the opening part. The middle part had each shot thought about and planned, whilst the opening shots were to be made out of a montage. I thought editing this would be quick. It wasnt. It shows the value of thinking hard about all shots in the film making process. The way we had to move locations several times shows the value of reconnaissance before shooting. Whilst it would have been impossible for us to undertake this given the time restraints, if you have the time, it would appear worth it.

Writing a script was definitely worth it.

Film editing exercise

My attempt at an edit of professionally shot footage. The audio existed an acted as a guide.
This is the full edit completed by our course tutor

A reflection on the editing process

One of the most interesting aspects of this exercise was the fact that we had an audio track laid down in which to match the images. This is completely about front for the way I had previously shot videos where the soundtrack was added post editing of the videos. This was actually a really nice way of working and has made me examine how I might shoot my own videos in future. It seems entirely plausible that, for narrated videos such as those above, that laying down the narration before editing the shots might be a good way to proceed. Indeed, laying down the narration before filming might also work.

One of the challenges I faced when putting the edit together was the self imposed need to ensure that the visual narrative, in the context of the daylight and the scenery, ran from morning to evening / low altitude to high. I set out to try and let the light fade as the video went on and as the mountain was climbed. I found this the trickiest part of the exercise.

The need for organisation of film clips was reinforced. The need to ensure that there are not too many film clips to choose from come the final edit.

My Film – discussion

Synopsis

This is the story of me. Written as the Hero’s Journey. Leaving school with GCSE’s I went to work in for a bank in cosmopolitan London. Sitting in the cashiers chair I took money in, and I gave money out. Day in, day out. Brown nosing the wealthy, charging the poor for breathing, the diet of loud music and drink gradually lost its ability to anethatise me against the soulnessless of my job. I needed something more.

So having loved the Lakes since a child I headed there to volunteer for the RSPB. There, over the period of several years I found meaning and I learnt. Nature gave me back meaning (was my mentor – can nature be a mentor?). One of the biggest things I learnt was that this celebrated, picture postcard landscape was, in fact, in real need of help. I decide to try and be that help which led me on a journey into education. Returning to Cumbria I got my dream job, I could finally make a difference.

But things aren’t that simple. Now on the front line of nature conservation I am constantly frustrated. The simple changes that make perfect sense are blocked, simply because people don’t like change, in particular influential people. The current system of land management, that has failed so many people for so long, is defended through an innate conservatism.

But if society can accept that things need to change we really can have it all. Wildlife, clean water, healthy soils, stored carbon and a spiritually rich landscape. We not only need to rewild the landscape, we need to rewild ourselves.

LOCATIONS

  • London – busy streets, rave music
  • Haweswater – photos, eagle valley, eagle footage`?
  • Education (University town? – Aber)
  • The Lakes – damaged nature.
  • Intact nature – Ennerdale? Croatia? Scotland?

Potential Script

Scene 1

The Ordinary World

I left school at 17, teenager of the suburb’s, to go and work for Nat West Bank. Serving customers as a cashier at a variety of branches in west London.  No fancy salary for me but I had cash in my pocket, low rent (thanks Mum and Dad) and a car to get me around. No different to any other teenager I guess. As I moved into my twenties I started to get bored. My job was meaningless, I was financially fine, but my job gave me no satisfaction. I started to look for something new.

The call to Adventure

In early 90’s London that new was to be found in the explosion of Indie music and rave culture. I started to listen to bands with a very different view of the world to the one I had been sold as a child. They questioned everything. I got into gigging and finally rave culture.

Then one night my life changed, Brixton Academy, March 1992. My world was literally blown away. I turned from a polite, middle class kid, standing respectfully in a crowd listening to music, to a whirling dervish. I jumped, I screamed, I whirled. I had never felt anything like it. I was taken completely out of myself, I felt something new.  Watching dawn break over London that morning, sat amongst a small wood, I heard the melancholic call of a Robin. I felt inspired.  Something had changed

This night tore me out of my sheltered, middle class existence and introduced into a new world of possibilities. My mind blown open, and my previous certainties turned to a kaleidoscope of half-truths and questions. It all came together

I started looking at the world around me from a new perspective. The greed of a society that seemed to have lost its way. The profit at all costs culture that was killing the planet. Wildlife was suffering and no one seemed to notice.  

Turning my new perspective on myself was no easier. My consumer driven lifestyle was spiritually empty and helping to drive this car crash. 

I needed new meaning in my life. I needed to do something with my life, something that I was proud of. I needed to try and change things.  

Scene 2

Refusal of the call & meeting the mentor

But then prevarication set in. I had money, I had a career (of sorts) and friends and family in London. Did I really want to go to all the effort? My natural conservatism was pushing back. Don’t rock the boat, keep my head down, get a mortgage, get married. Follow the rules.

Once again it was an experience with nature that give me the inspiration to carry on. Standing at Acton Town tube station, waiting for a train to take me home after yet another soul destroying day, a robin once again sang its song. Above the rumble of the trains, the drone of traffic and the bustle of people, his voice rose, piercing my heart. I started to spend more time in nature and it was here that I found a soothing balm from the drudgery of

Scene 3

Crossing the threshold

I left work that year and headed to the Lake District. I was introduced to this area of the world as a child by my parents and had visited it many times since. The Lake district was to me was the robins melancholic song writ large. It was wild, untamed nature, red in tooth and claw and I wanted to immerse myself in it. I headed to Haweswater to volunteer for the RSPB on their Eagle watch program. I lived in a basic hut, with no TV and no connection to the outside world and I spent all day, everyday outdoors. It was thrilling. I saw eagles and falcons (birds I had always loved as a child) and I planted trees and I cut bracken. It really was the best of times. Another moment of clarity arrived in 2007 whilst high of the fells above Haweswater undertaking a mountain ringlet survey. As I lay in my sleeping bag in the early morning light, listening to a skylark singing above my head, I knew with certainty that I wanted to work in nature conservation. The skylarks song, was calling to me. DO I MENTION HERE MY FIRST KNOWLEDGE OF NATURES ILLNESS?

Tests, allies, enemies – meeting your Nemesis

I went back to school to learn my trade. A-Levels preceded a degree in Environmental Science which led onto a masters in Conservation Management. The more I learnt, the more I realised that nature was in trouble. Even those beautiful Lakeland fells that I had so fallen in love with, that called to me across the country, was not healthy. Far from the picture postcard we are presented of the Lake District, it was actually in a really poor state. Rivers had been straightened and tamed. Flower rich meadows dug up, soils were degrading, the few woodlands left were dying on their feet and the fells shorn of life. Wildlife was dying. The picture postcard I had in my mind from childhood was slowly melting.

Determined to do something about this I applied for jobs in the Lakes and, luckily found work first with the RSPB at Haweswater, and then with Cumbria Wildlife Trust.

Types of shot – shooting for the edit

Shooting for the edit is a technique used to aid you in post production. As a filmmaker and videographer, you will need to keep the editing process in mind while shooting footage. By doing this, you are enabling yourself to make the editing process that much easier.

It’s common practice to film the same action a number of times in a number of ways in order to have as many options as possible in the edit. Clever use of different shots will help with the sequencing

Get Coverage – A roll and B – roll

If you consider A-roll to be the narrative of the video, B-roll is the additional footage that supplements the story and drives the piece visually. If you’re shooting a basic talking head video, any shot that changes things up (a close up of the speaker’s hands gesturing, a shot from a side-angle, or a shot of a related office scene) could serve as B-roll for your video.

B-roll helps to diversify the shots in a video and tell a compelling visual story. Bonus: It can also help you hide edits. In other words, if you’re splicing together two straight-on shots of a subject talking, you can use B-roll to make the transition feel smooth.

Planning for where you’re going to use B-roll in the script can save loads of time. If you know you’re going to be showing B-roll in a particular section, your subject can read right off of the script and not have to memorize and recite the line to the camera. Talk about low pressure.

There are different types of shots you will want to capture on your shoot:

Wide shots
Start with a wide shot to give the audience a sense of direction for the sequence and to establish the story. A wide shot is sometimes referred to as the master shot as you can tell the whole sequence in one shot. You can also dip in and out of the edit. More importantly, it means you have a ‘safety’ before you start filming other shots.

Mid shots
This is how we naturally see people.Keep in mind that you don’t need to have the action happening for too long, but make sure you capture enough to be able cut into and out of the shot in the edit.

Close ups
Close ups are some of the most important shots you can take as they give the audience the chance to really connect with characters and the story.You can lead into a close up from a mid shot or medium shot.

There are various ways you can move to other parts of the sequence such as a pull focus, a tilt down or a pan.

Cutaways
A cutaway is another type of shot you can use to help piece your sequence together.
A cutaway is a shot that’s usually of something other than the current action. It could be a different subject (eg. this cat when the main subject is its owner). These additional shots outside of the sequence are also very important as they can be used at any point in the sequence and they add to the story.

Remember, continuity is very important when filming a sequence and will make a difference when editing. It’s standard practice to repeat the same shot a number of times from different angles to help create a more seamless cut during the editing process. Another good rule of thumb is don’t just get one medium or tight shot of each scene. One wide and a couple of medium shots of a scene may suffice, but on the tight shot get at least four or five. This will give you more choices in the final edit. Also, to get the tight shots zoom with your feet. In other words get the camera in there, it will also help you pick up the important natural sound, or nat-sound. 

All of these shots should be thought about before heading out with your camera and recorded on your storyboard

Jump Cuts

When getting your Wide, Mid and Close up shots remember that the camera is not nailed to the floor. Move it to get a different angle between each shot or you risk the edited video looking like a “jump cut.” A jump cut is a cut in film editing in which two sequential shots of the same subject are taken from camera positions that vary only slightly if at all. This type of edit gives the effect of jumping forwards in time.An example would be “Cutting from a full-figure master shot, for instance, to a slightly tighter shot that frames the actors from ankles up. The new shot in this case is different enough to signal that something has changed, but not different enough to make us re-evaluate its context. The displacement of the image is neither motion nor change of context, and the collision of these two ideas produces a mental jarring – a jump – that is comparatively disturbing.”

180 degree rule

When moving the camera, keep in mind the 180-degree rule. The 180-degree rule in video or filmmaking is a basic rule that the camera should never cross an imaginary axis drawn across your scene. (See Wikipedia Link Below) This can also be visually jarring to the viewer and can be a real problem in the edit.

Making video page 28

The 180-degree rule: Shots can be intercut between cameras located on the same side of the imaginary line – ie between 1 and 2 or 3 and 4 – so that each person stays on the same side of the video frame. If, however, you switch between cameras on opposite sides of the line (eg 1 and 3 or 2 and 4) then the two subjects will swap sides during the footage – very confusing! Pic: Guardian

Sequencing

The sequence is the foundation of all video storytelling. Sequences compress time in a video story. Without this compression, what you’re left with are long video clips that visually bore viewers to death.

Proper sequencing gives the video editor a better way to pace a story by using a variety of wide, medium and tight shots. This helps move the viewer through a story efficiently. Unfortunately, it seems, the sequencing lesson did not stick with people after whatever training (if any) they might have had.

So let’s review the basics.

Sequencing helps compress time in a video. If you videotape someone leaving their house, walking down a path, getting on their motorcycle and driving off, it might take a minute or more to show all the action in real-time. We don’t have that amount of time for our video, so we shoot a shot of the subject coming out of the house, a tight shot of his feet walking into and out of frame. A shot from behind the subject walking up the bike. Then a shot of the subject sitting on the bike, cut to a tight shot of his foot kick-starting the engine. Then another tight shot of his hand revving the throttle. Finally, we get a shot of the subject riding off in the sunrise. Whew. That was hard work. But you know what? Edited together, you can compress that one-minute real-time clip into 20 seconds or less. The cool thing is the viewer understands this sequence and buys into your compression of time. Why? Because they see time compression everyday when they watch TV or a movie.

Try to remember to shoot a variety shots. Shoot the action and then the reaction. It’s most important to hold your shots for about 10 seconds each. Don’t pan or zoom; just let the action enter or leave the frame. I had a video editor once tell me that if a cameraman shoots a wide, medium and tight shot of every composition, then he could edit anything.

As I have incorporated more sequencing into my video, I’ve found that I have cut down my editing time considerably. The other thing you should remember is to weight your shots to the tight and super tight end of the shooting spectrum. Tight shots make great transitions between two wide shots or two medium shots. They prevent the infamous jump cut (two shots that look the same) that annoy and confuse people viewing your video.

Storyboards

A storyboard is a graphic representation of how your video will unfold, shot by shot. It’s made up of a number of squares with illustrations or pictures representing each shot, with notes about what’s going on in the scene and what’s being said in the script during that shot.

When you storyboard a video you’re shooting with the edit in mind, including all the shots you’ll need, the order that they’ll be laid out, and how the visuals will interact with the script.

The storyboard is a starting point or suggested thoroughline around which you can plan your coverage (all the angles you will shoot of a scene). This really comes in handy when you’re making your video, as it ensures you won’t forget any scenes and helps you piece together the video according to your vision.

Image result for using storyboards

The Shot

The Shot is probably the most essential and basic aspect of a film or video and refers mainly to the cameraman shooting one length of continuous (unedited) action.

A “Shot” can be as short as a single frame or it can be many minutes long. The criterion for a “Shot” is not the length of time that the camera is running – it’s all about the continuity  of the action.

There are many types of shot that can be used to help tell a story, described here.

The Scene

The Scene is generally thought of as the action that takes place at a certain place and time in the story. It is made up of a number of different shots.

Many times a scene will start with a master shot which captures the entire scene is a single shot, and then include additional shots (e.g., close-ups, cut-ins and cutaways) that are edited in to the video or film to comprise the complete scene.

The division of the movie or video into scenes is planned out in the video production script and are not necessarily shot in order. They will be put in the proper sequence in the post-production of the video or film.

Storyboards are

Sound recording

Polar pattern – The pattern in space in which sounds will be picked up by a microphone. Different microphones have different sound pattens.

Directional/Shotgun microphones – Isolate certain sounds by pointing the them. Useful for interviews when you want to isolate a persons voice from background noise. Or for recording music. A shotgun microphone has a polar pattern in the form of a cone, just like shotgun pellets leaving a shotgun (hence the name).

Omni-directional microphones – picks up sounds from multiple directions. Good at recording background noise. Also called ambient sound, wild track (when recording outside). Omni-directional has almost 180 degrees polar pattern.

Lapel mike – Cardiod microphone. Has a mushroom polar pattern to pick up the voice.

Hand/Stage mike – Cardoid microphone Dynamic microphone – Has a mushroom polar pattern that picks up voices (like a lapel mike)

Hiss and crackle – Can be caused by the electrical noise of the recorded, interference from other signals (such as mobile phones)

Golden rules –

  • Pick the right mike for the job
  • Get close to the source,
  • Get your recording levels right – Avoid peaking – peaking is when the sound volume is so high, you start to get distortion levels run between -48 to 0. You should aim for levels at -12. If your level is lower then you will need to boost levels post production (which will boost hiss etc). If higher than -12, then you risk distortion if the volume of the incoming sound gets suddenly louder (such as someone getting animated/angry). The -12 level gives just enough clarity of sound whilst leaving room for sudden loud sounds.
  • Shotgun mikes are not very good at moving around.
  • Don’t move or touch the microphone once it is set up.
  • Always wear headphones – don’t use noice cancelling, use closed back

Foley

Named after sound-effects artist Jack Foley, this is the reproduction of everyday sound effects that are added to film, video, and other media in post-production to enhance audio quality. These reproduced sounds can be anything from the swishing of clothing and footsteps to squeaky doors and breaking glass. Films are now made with all the sounds in a scene made independently and dubbed in. For instance, the sound of horses hooves galloping, the squeaking of leather armour, the jingling of harnesses, even the snorting of the horses as they run, are made in a studio. these are then dubbed over the film. The art of this is called Foley (after Jack Foley who invented this).

Ambiance/Wild-track

Wild track, also known as wild sound and wild lines, is an audio recording intended to be synchronized with film or video but recorded separately. Generally, the term “wild track” refers to sound recorded on location, such as sound effects gathered when the cameras were not rolling or extra takes of lines performed for audio only.

Composition and Framing

Rule of thirds

The rule of thirds states than an image is most pleasing when its subjects or regions are composed along imaginary lines which divide the image into thirds — both vertically and horizontally

Leading lines

Leading lines are the lines in a photograph that lead the viewer’s eye in and then out of frame. Sometimes they don’t lead the eye out of the frame at all, but cause the eye to circulate around the subject.

Most often the leading lines will start in the foreground and disappear into the background. They might converge to a point of infinity in the background. This creates a sense of movement through the image as the viewer’s eye journeys through.

Composed using light as a leading line

The light shining on the child is a leading line directing the eye straight to the child, placed using the rule of thirds. The floor also acts as a leading line.
Use leading lines found in nature

The path in the grass acts as a leading line taking the viewer into the shot to the subject and following her direction of movement out of frame
Repeating architectural columns as leading lines

3 composition rules are in use: repetition of the pillars to create a leading line on camera right, repetition of lights to create a leading line on camera left, the pier on camera right as a leading line and placement of the subject using rule of thirds.


Create leading lines with striped material

The lines of the material act as leading lines to the model’s face, as do her arms and the shoreline in the background.

Symmetry

Keeping your subject symmetrical is another good technique to use in photography. You can also achieve amazing results by exploring interesting ways to show symmetry in your subject(s) or finding a break in the symmetry.

Dark Coast

Symmetry can be used in different ways in films. Some people claim that symmetry, being un-natural (how often do we see a purely symmetrical scene in nature) can be used to ‘jar’ the eye. make us uneasy. Classic use of this is in the film the shining. I think this work because the symmetry is SO absolute. Everything is mirrored right down to the twins. when symmetry is less absolute, then a symmetrical shot can actually be pleasing to the human eye as it has a sense of ‘order about it’. this can be as simple as placing tow people talking to each other on opposite sides of the frame.

Practising different shots

This evening we have been learning about different types of shot and undertook a practice filming of a mundane task. This was to include at least 5 shots, each showcasing a different type of shot. Our mundane task was to show me walking in the college and logging into the computer. As such our shot list was….

1: Establishment shot – We were going to film the front of the college but, it was too dark. We therefore shot an out of focus-in focus shot of the Kendal college poster – This establishes where we are. Kendal College.

2. Tilt/Pan shot – This is a shot of me walking up the stairs. The shot tilts as I gain hight, and then pans as I turn the corner to head down the corridor. This shows movement and progression from the front door. Without this type of shot I would have moved quickly out of shot. We could/should have shown more detail about where I was first i.e. walking through the front door perhaps, next to the kendal college poster we used in the establishment shot.

3: Follow shot – This shot follows me walking down the corridor and opening the door to the classroom. Like the tilt/pan above it shows movement, the character moving through the building.

4: Static shot – With the camera static, it shows me walking INTO the classroom and sitting down at my desk. I walk across the shot and so it is static. The static nature makes it hard to identify my face.

5: Close up – A close up of me logging in – This type of shot shows clearly what I am doing and it moves the narrative along, showing I am getting into the computer.

6: Reveal shot – Shot on a tripod (so also a static shot) – I spin around in the chair to reveal who I am – I have not been seen properly before

Different types of camera movement

Static tripod shot – When there’s no movement (i.e. locked camera aim) it’s called a static shot.

Why would i use – These camera shots emphasize the appearance and movement of your subject against its environment.

when would i use – Static shots work well in comedy because the actor’s performance trumps the camera moves.

Hand held movement – Holding the camera in your hands (rather than on a tripod) means that you get a ‘shaky’ film. This gives the impression that you are actually ‘in’ the film.

Why would i use – Human heads naturally move and so you feel that, rather than being an observer of the action, you are actually part of it. It therefore heightens tension, increases realism

When would i use – When i wanted to add energy into a scene. It can also add tension, and increases realism. I might use it if i wanted to make the viewer think they are in the film. I would not use it when shooting landscapes or stationary objects.

Steadicam/gimbal – A steadicam is a camera stabilizing device that attaches to the camera operator. It uses a counterbalancing system for smooth and stable camera moves. Gimbals are another camera stabilizing device that use motorized gyroscopes to reduce friction. It is more compact than a Steadicam and completely handheld. This allows it to fit through tight spaces.

Why would i use – Both of these techniques are used to smooth the camera shot and give you a fluid shot. It allows you to follow an object through twists and turns and around rooms.

When would i use – During parts of the film where i wanted to move fast but not in such a way as to make you think you are in the film (as in hand held). So perhaps following someone running, or a car driving. very good for making sweeping shots across landscapes.

Pan & Tilt – Pans move the camera side to side on a horizontal axis. This can reveal something to your viewer or allow them to follow an action. Tilting is when you move your camera up and down on a vertical axis. So it’s exactly like a pan, only vertical.

Why would i use – In order to follow a character as they move across a scene. Or to to fit more into a frame. Likewise tilting fits more into a frame. A slow upward tilt can be used to make thing look bigger (and visa versa)

When would i use – Panning the camera could be used when you wish to follow a character across a scene. It could also be used to reveal more of a scene, such as panning across a landscape, perhaps revealing the character at the very end. Slow upward tilt could be used to add dramatic effect to a character or scene. Increase their presence.